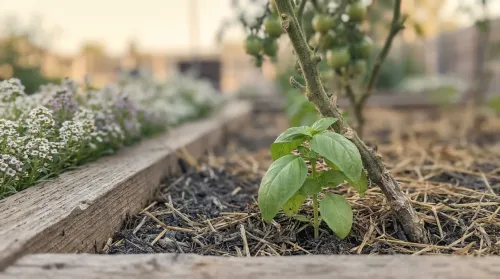
A crisp edge is the highest-return upgrade in any garden — steel bends to any curve, shrugs off frost heave, and outlasts the cheap strip you'd only buy twice
A crisp edge is the highest-return, lowest-cost upgrade in any garden. It's the line that separates a bed that looks tended from one that looks like it's losing a slow war with the lawn. And yet search garden edging and Google hands you a wall of product grids — a shopping carousel, a dozen retailer landing pages — instead of a straight answer to the only three questions that matter: which material, how much, and how do I actually install it.
Let me fix that. This guide compares every landscape edging material on cost, lifespan, and difficulty; tells you the genuinely cheapest ways to edge (one of them is free); and walks the install step by step, including a no-dig method nobody on page one bothers to cover. Short version, if you want to stop reading now: for most yards, steel or aluminum metal edging is the best all-round pick, and edging runs about $3.50 to $8.80 per linear foot installed — far less if you do it yourself.
Which Garden Edging Is Best? At-a-Glance Comparison
For most yards, steel or aluminum metal edging is best — it bends to curves, resists frost heave, and lasts 15 to 30-plus years at a mid-range price. Want a permanent, premium look and don't mind the labor? Stone or brick will outlive you. Working with the tightest possible budget? Plastic edging, or a bare spade-cut trench, gets it done for almost nothing.
Here's the whole decision on one screen — the comparison no product grid will ever show you, because a product grid's job is to sell you the most expensive option, not the right one. Every figure is per linear foot, current for 2026.
Material
DIY-material $/ft
Installed $/ft
Lifespan
Install difficulty
Best for
Spade-cut trench
$0 (labor only)
—
Re-cut each season
Easy
A zero-dollar budget
Plastic / poly
$0.80–$3.50
$5–$12
3–7 yrs
Easy
Fast, cheap, temporary
Wood / timber
$2.50–$7
$4–$10
3–8 yrs
Easy–Moderate
Warm look, raised beds
Brick
$2.50–$6.50
$18–$38
20–50+ yrs
Moderate–Hard
Classic permanent borders
Metal (steel/aluminum)
$2–$11
$10–$28
15–30+ yrs
Moderate
Best all-round value, curves
Stone / paver
$3–$21.50
$18–$38
20–50+ yrs
Hard
Premium permanent look
Concrete curbing
— (pro)
$14–$40
20–50 yrs
Pro-installed
Continuous mow-strip curb
Read it top to bottom and the pattern is obvious: the cheapest edge is free (a spade trench), and the longest-lasting are stone, brick, and concrete at 20 to 50-plus years — but those also carry the steepest installed prices. Metal is the line where value and longevity cross: mid-range cost, a 15-to-30-year life, and it flexes around curves that would have you cutting brick all afternoon. That's why it's my default recommendation, and it's the row I keep coming back to below.
Types of Garden Edging by Material
Six manufactured materials, plus the free option. Here's each one on look, cost, lifespan, and the job it's actually good at — the same organizing axis every retailer uses, minus the pressure to buy.
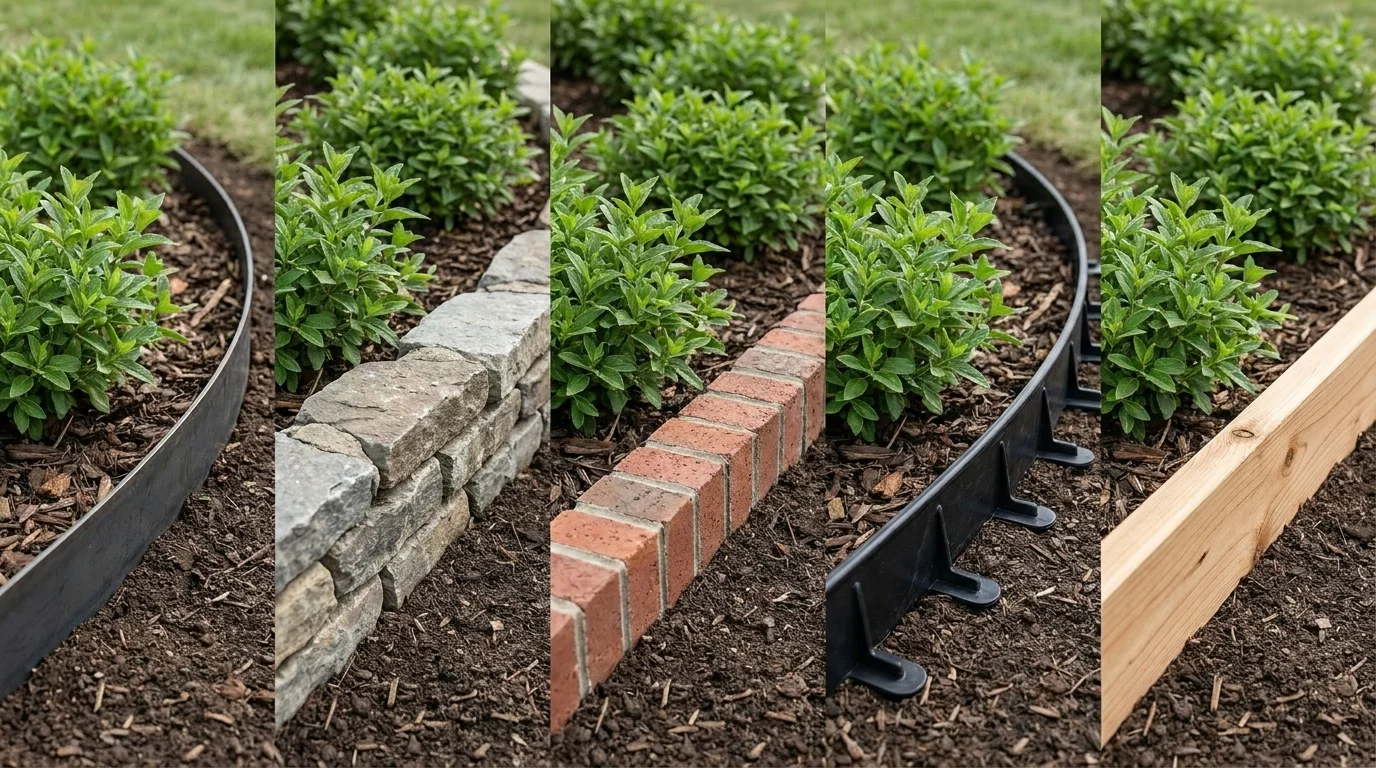
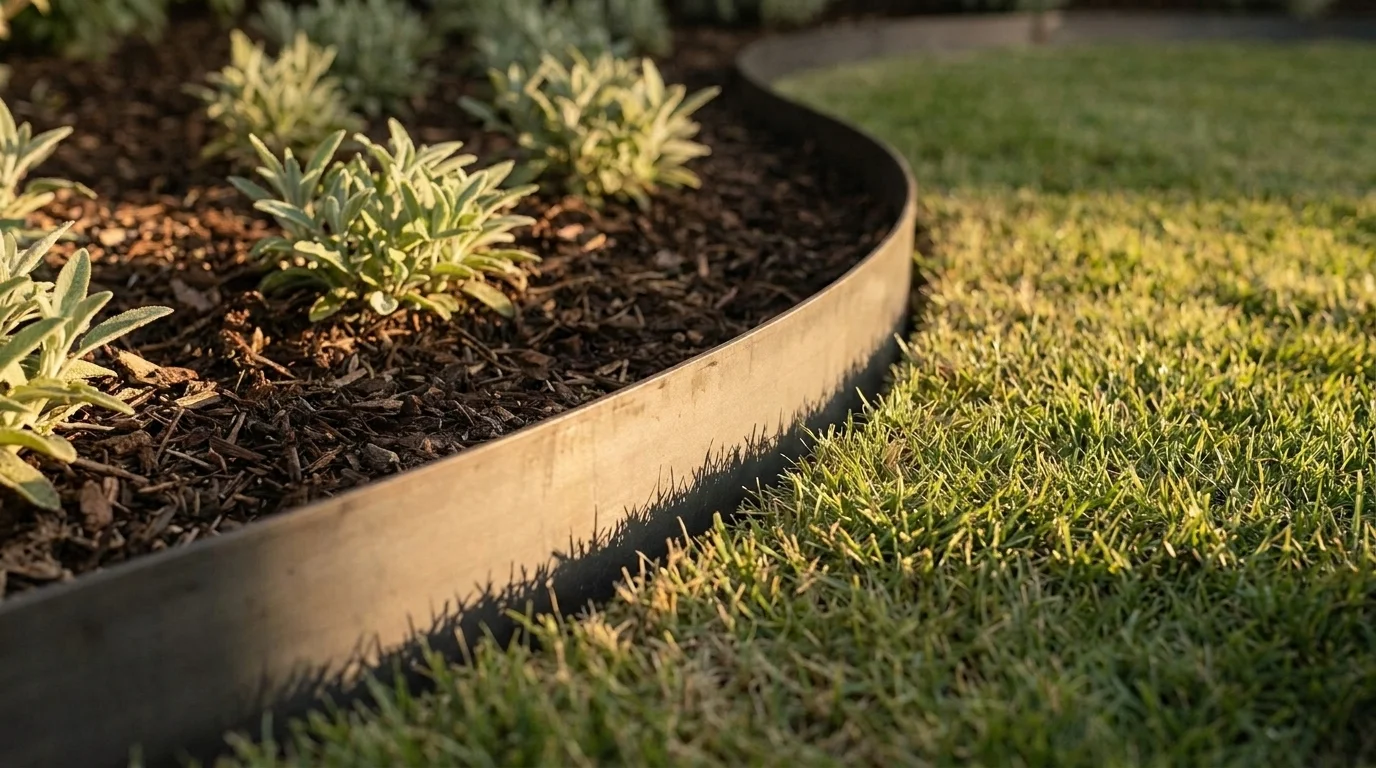
The all-round value pick, and the one I'd tell a friend to buy first. Steel and aluminum strips ($2–$11 a foot for the material) bend around curves that would defeat brick, shrug off frost heave, and last 15 to 30-plus years — aluminum sits at the top of that range because it won't rust. It reads as a thin, almost invisible dark line, which is exactly what you want: the plants are the show, not the border.
Stone & paver edging
The permanent, premium end — 20 to 50-plus years, and genuinely beautiful. It's also the hardest to install and the priciest, from $3 to $21.50 a foot for material alone, before you've dug a single inch. If you've got the budget and the patience, nothing else looks as settled and intentional. If you don't, keep reading.
The classic soldier-course border — bricks stood on end at an angle — has been earning its keep in gardens for a century. New brick runs $2.50 to $6.50 a foot and lasts 20 to 50-plus years. Here's the contrarian note: reclaimed brick, off a demolition site or a neighbour's torn-out patio, is often free, and it's the same brick. This is where a small budget stops being a limitation and starts being a sourcing problem you can solve.
Plastic / poly edging
The cheapest manufactured option, $0.80 to $3.50 a foot, and the easiest — you stake or push it straight into the ground, no trench required. I'll be honest about the trade-off: plastic warps in the sun and heaves up in the frost, and you're looking at a 3-to-7-year life before it starts lifting at the seams. It's fine as a fast, temporary fix. It's a false economy if you're trying to edge once and forget about it.
Wood & timber edging
Warm, natural, and forgiving to install — board or timber edging costs $2.50 to $7 a foot and suits raised beds especially well, since the same board that edges the bed can retain its soil. Untreated wood lasts 3 to 8 years before rot takes it; that's the price of skipping chemical treatment, and for a lot of gardeners it's a fair trade.
Concrete curbing
The continuous poured curb you see snaking around suburban lawns — 20 to 50 years of life, $14 to $40 a foot installed (the high end is stamped and colored). One caveat I won't soften: this is not a DIY job. It needs a pro with an extrusion machine, so it's the one option on this list where you're paying for labor no matter what. Budget accordingly.
The free option — a spade-cut trench
No material, no purchase, $0. A clean V-shaped trench cut with a spade is a real edge — it's what separated a bed from a lawn for centuries before anyone sold you a plastic strip. The catch is maintenance: you re-cut it each season as the grass creeps back. If you're edging a rented yard you can't permanently alter, or you just want to see the shape before you commit money to it, start here. It's the DIY Gardening principle in its purest form — spend effort instead of dollars — and there's a right way to do it, coming up below.
Loading image...
Six materials, one honest comparison no product grid will show you: metal is where value and longevity cross, stone and brick where permanence begins
What Garden Edging Costs
On average, garden edging costs $3.50 to $8.80 per linear foot installed — that's the national number to anchor on (LawnStarter, December 2025). But "average" hides an enormous spread, and the spread is the whole story.
Installed, plastic is the floor at $5 to $12 a foot, with wood right beside it at $4 to $10. Metal lands in the middle at $10 to $28. Brick and stone climb to $18 to $38 for a proper soldier course or a set border, and concrete curbing tops out at $14 to $40. Buy the material only and every one of those numbers drops by more than half — which brings us to the arithmetic the retailers would rather you didn't do.
Take a typical 180-foot run around a couple of beds. Professionally installed, that's $630 to $1,584. Do it yourself and it's $340 to $960 — a saving of roughly 45 to 60 percent, and almost everything you're cutting is labor, not material. I have never once paid someone to cut a trench I could cut myself, and this is exactly the math for why: the spade doesn't send an invoice.
What pushes the bill up is predictable, and it's three levers. Trenching and labor first. Then corners and curves — every angle is another cut. Then the material tier, where stone and concrete are always the expensive end. Know those three and you can steer the cost before you buy a single foot.
What's the Cheapest Way to Edge a Garden?
A clean V-shaped spade trench costs nothing but labor; the next-cheapest options are free or reclaimed materials — collected stone, reclaimed brick, or log rounds. That's the honest answer the retail results bury under a wall of things to add to cart.
The bare spade trench is the cheapest edge that exists, full stop. Cut properly — a clean vertical wall on the bed side, a gentle slope on the lawn side — it looks deliberate, not lazy, and it costs you one afternoon and zero dollars. (The technique is in the install steps below.)
Want something more permanent for nothing? The material is usually already around you: collected river stone, reclaimed brick from a torn-out patio, log rounds from a fallen limb, leftover pavers, a bag of gravel. Epic Gardening's own budget list runs exactly this way because it works — as they put it, "A clean edge makes the whole garden look more intentional, and it doesn't have to cost much."
One warning, because budget rigour cuts both ways. The cheapest plastic strip is not the cheapest edge — it's the most expensive one you'll buy twice. Plastic that warps and heaves in 3 to 7 years, replaced two or three times, quietly costs more than a single run of metal or a stone border that outlives the mortgage. Cheap up front and cheap over ten years are different questions. Ask the second one.
How to Install Garden Edging: Step by Step
Installing edging isn't skilled work — it's patient work. The whole job is: mark a line, commit to it, and set your material along it evenly. Here's the procedure that covers every material on the list.
Tools & prep. Lay out the line first. A garden hose is the best tool ever invented for this — drop it on the ground, curve it however you like, and step back until the shape reads right. For straight runs, use a string between two stakes. Then gather a spade, a rubber mallet, and a level. That's the whole kit.
Dig-and-set method
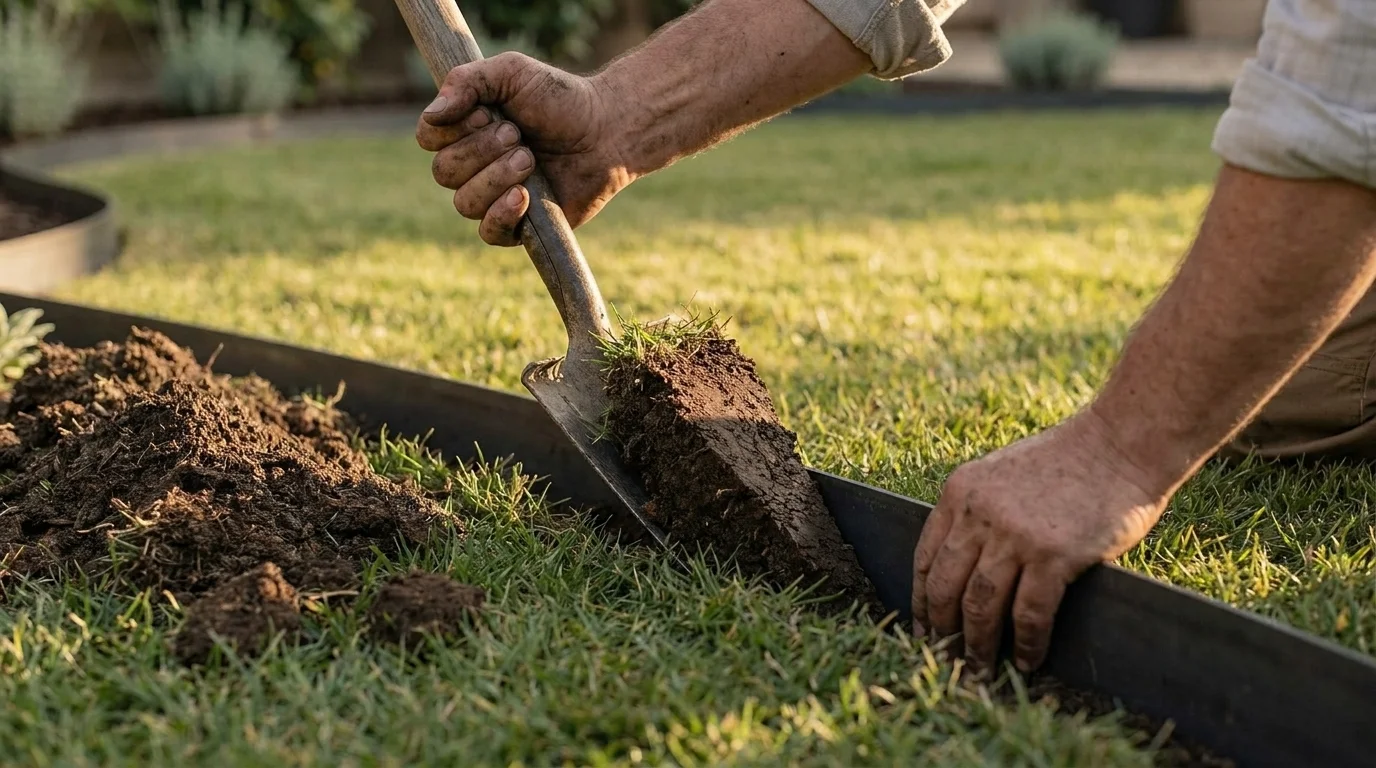
This is the one for stone, brick, paver, and metal strip. Cut a trench along your marked line, a spade-blade wide and deep enough to seat your material with its top edge sitting flush with — or a touch below — the lawn, so a mower can ride right over it. Set each piece, tap it level with the mallet, then backfill both sides and tamp the soil down firm. Work in short sections and check the level constantly; a border that dips and rises reads as sloppy from clear across the yard.
Loading image...
Two ways in: trench-and-set for stone and metal, or a push-in strip that needs no digging — the reversible edge a renter can pull straight back out
The no-dig / push-in method
The low-effort route the ranking how-to guides skip entirely. Push-in metal or plastic strip edging is built with a spiked or tapered bottom edge that seats straight into the soil surface — no trench, no backfill. Line it up, step or mallet it down until the top sits where you want it, and move on. It's faster, it's kinder to your back, and for a renter it's the reversible option: it pulls right back out and leaves the yard exactly as you found it.
Finishing. Whichever method you used, walk the whole run with the level one last time, firm the soil on both sides so nothing shifts, and mulch right up to the edge. That last step is what makes the shadow line pop.
What Is the 3-Inch Edging Rule?
It's cutting a spade-width trench about 3 inches (roughly 8 cm) deep along the bed edge — enough to sever creeping grass roots and cast a crisp shadow line. It's pitched as spring-lawn prep, and it's genuinely the simplest edge there is.
The rule got its name from garden writers as a fail-safe way to keep grass out of your borders: three inches is the depth that reliably cuts through the runners a lawn sends sideways into your beds, while the vertical cut throws a shadow that makes the border read as intentional. No material, no cost — it's the spade trench from earlier, given a number.
The pros go a little deeper. As Ray Baker writes in Fine Gardening, "Once you've established your edge, refine it with a spade, deepening the cut to 4 to 6 inches." That extra depth does a second job: it gives mulch somewhere to sit without spilling onto the lawn. So treat three inches as the floor and 3 to 6 inches as the working range — shallow to sever roots, deeper to also hold mulch. Either way, it's the same free technique doing the work.
Edging Ideas for Flower Beds, Raised Beds & Lawn Borders
Where the edge is going should decide what it's made of. Same materials, different jobs.
Flower bed edging
For defined flower borders, curved metal strip or a brick soldier course are the two that look most finished. Metal disappears and lets the planting do the talking; brick frames it like a picture. Both hold a clean line even when the bed behind them is a controlled riot.
Raised bed edging
Here the edge does double duty — it's also the retaining wall. Timber board or stacked stone frames the bed and holds the soil in, which is why wood earns its place in raised beds despite its shorter life. If you're building the bed anyway, the edge is nearly free.
Lawn borders
Along a lawn, you want a mow-over edge: a metal strip or a clean spade trench set flush, so the mower wheel rides the edge and you skip the string-trimmer entirely. That one detail is the difference between edging that saves you work and edging that creates it.
Edging curves
This is where material choice gets decided for you. Flexible metal and plastic bend to a curve straight off the roll; brick and stone have to be cut to follow one, piece by piece. If your beds have curves — and good beds usually do — that alone is an argument for metal.
Loading image...
The cheapest thing in the garden that makes the whole space look expensive. It's not the plants people notice first — it's the line around them
Do any of these well and you get the payoff that 400,000 people watched a video for: a clean edge is the cheapest thing in the garden that makes the whole space look expensive. It's not the plants people notice first. It's the line around them.
The Bottom Line
Strip away the product grids and garden edging is one decision, not fifty: metal for the best all-round value, stone or brick when you want permanence and have the budget for it, and a bare spade trench when the budget is zero. Every one of them beats the ragged line you have right now.
Pick a row from the matrix, pick a single bed, and edge just that one this weekend — you'll watch the whole garden change from one project. Then come back to the DIY Gardening category for the next one: raised beds, mulching, and the rest of the affordable, do-it-yourself work that makes a garden yours.
Frequently Asked Questions
Do you have to dig to install garden edging?
You don't have to dig for every type of garden edging. Push-in metal or plastic strip edging seats straight into the soil surface without a trench, making it the fastest, most renter-friendly option. Stone, brick, and paver borders are the exception — those need a shallow dug bed to sit level and stay put. So it depends entirely on the material you pick.
Which garden edging material lasts the longest?
Stone, brick, and concrete edging last the longest — 20 to 50-plus years, effectively permanent installs. Aluminum follows at 20 to 30 years and steel at 15 to 25, both well ahead of the softer options. Wood and plastic sit at the bottom, lasting only 3 to 8 years before rot, warping, or frost heave finally takes them.
Is metal or plastic garden edging better?
Metal garden edging is the better choice for most gardens: it costs more upfront but lasts 15 to 30-plus years and resists the frost heave that lifts cheaper edging. Plastic is the cheapest and easiest to install, but it warps in sun and heaves in frost, lasting only 3 to 7 years. Choose plastic for a quick temporary fix, metal to edge once and forget it.
How much does garden edging cost?
Garden edging costs about $3.50 to $8.80 per linear foot installed nationally. Doing it yourself cuts that sharply — a 180-foot project runs roughly $340 to $960 DIY versus $630 to $1,584 professionally installed, a saving of 45 to 60 percent. Material tier, trenching labor, and the number of corners and curves are what move the final price.
When is the best time to install garden edging?
Early spring is the best time to install garden edging — before beds fill in and the lawn takes off, while the ground is still workable and easy to cut. Edging then sets a clean line for the whole growing season and keeps grass from creeping into borders from the start. Any mild, dry stretch when the soil isn't frozen or waterlogged also works.
VerdeNook is more than just a source of gardening wisdom; it’s a platform for sharing, learning, and growing together. We invite you to join our community, share your stories, and spread the joy of gardening. Let’s sow the seeds for a greener, healthier, and more sustainable future, one garden at a time.