Water-Wise Gardening: Sustainable Landscaping and Irrigation Techniques
Share this article:
A xeriscape uses fifty to seventy per cent less water than the lawn it replaced. The mechanics are soil chemistry, plant biology, and irrigation arithmetic.
A south-facing front lawn in midsummer is one of the least efficient pieces of horticulture a household can own. In arid US states, roughly 75 per cent of residential potable water goes to irrigating turf; the EPA reports that as much as half of that irrigation water is wasted to evaporation, wind drift, and broken or mistimed sprinkler systems. Replace the lawn with proper xeriscaping — the umbrella term for water-wise design — and the same yard uses 50 to 70 per cent less water, drops its annual maintenance hours by about the same amount, and — done well — looks better in October than the lawn did in July.
This guide is what to plant, how to water, what the math actually is, and how to do it on a homeowner's budget. "Water-wise gardening" and "xeriscaping" describe the same practice; I will use both. The mechanics are mostly soil chemistry, plant biology, and irrigation arithmetic. None of it is mysterious.
The 7 principles of xeriscaping
The term xeriscape was coined by Denver Water in 1981, and the seven-principle framework that came out of that program is still the cleanest organising structure for the topic. The Wikipedia entry on xeriscaping preserves the canonical list:
Planning and design. Survey sun, slope, soil, and drainage before planting anything.
Soil improvement. Add organic matter to improve water-holding capacity and reduce runoff.
Appropriate plant selection. Choose plants matched to your zone, your sun exposure, and your rainfall.
Practical turf areas. Shrink the lawn to where it is genuinely useful — a play area, a path. Replace the rest.
Efficient irrigation. Drip lines, soaker hoses, and weather-aware smart controllers, not overhead sprinklers.
Mulch. Two to four inches of organic mulch on every bed, every year.
Appropriate maintenance. Less than a lawn, but not zero.
Most of this article is depth on those seven moves. The order matters: the first three principles do most of the work, and the second three multiply it. Skip the first three and the last four cannot compensate.
Soil improvement: where every water-wise garden begins
Most failed xeriscapes were settled at the soil profile. A garden built on compacted clay or hydrophobic sand cannot retain the water its plants need; everything you do downstream — drip lines, mulch, drought-tolerant selection — fights the substrate.
The diagnostic is simple. Press a thumb firmly into the soil surface. If the print holds a sharp edge and feels cool, the soil is at or near field capacity and has the pore space and crumb structure water can move into. If the water beads on the surface and refuses to infiltrate, the soil has gone hydrophobic — surface tension is holding water out, and no amount of irrigation will reach the root zone until the structure is rebuilt. If the thumb sinks into a saturated film, drainage is the problem.
The fix in every case is organic matter, applied from the top, every season, indefinitely. Two to three inches of well-finished compost worked into the top six inches of an existing bed will raise the soil's water-holding capacity measurably within one growing season. The same compost top-dressed annually and held in place by mulch will continue to build structure for decades. This is the slow chemistry beneath the visible garden — the cation exchange capacity rises, the aggregate stability improves, the pore space between crumbs holds rather than collapses, and the rhizosphere becomes a system that can do its own water management rather than one that depends entirely on what comes out of the hose.
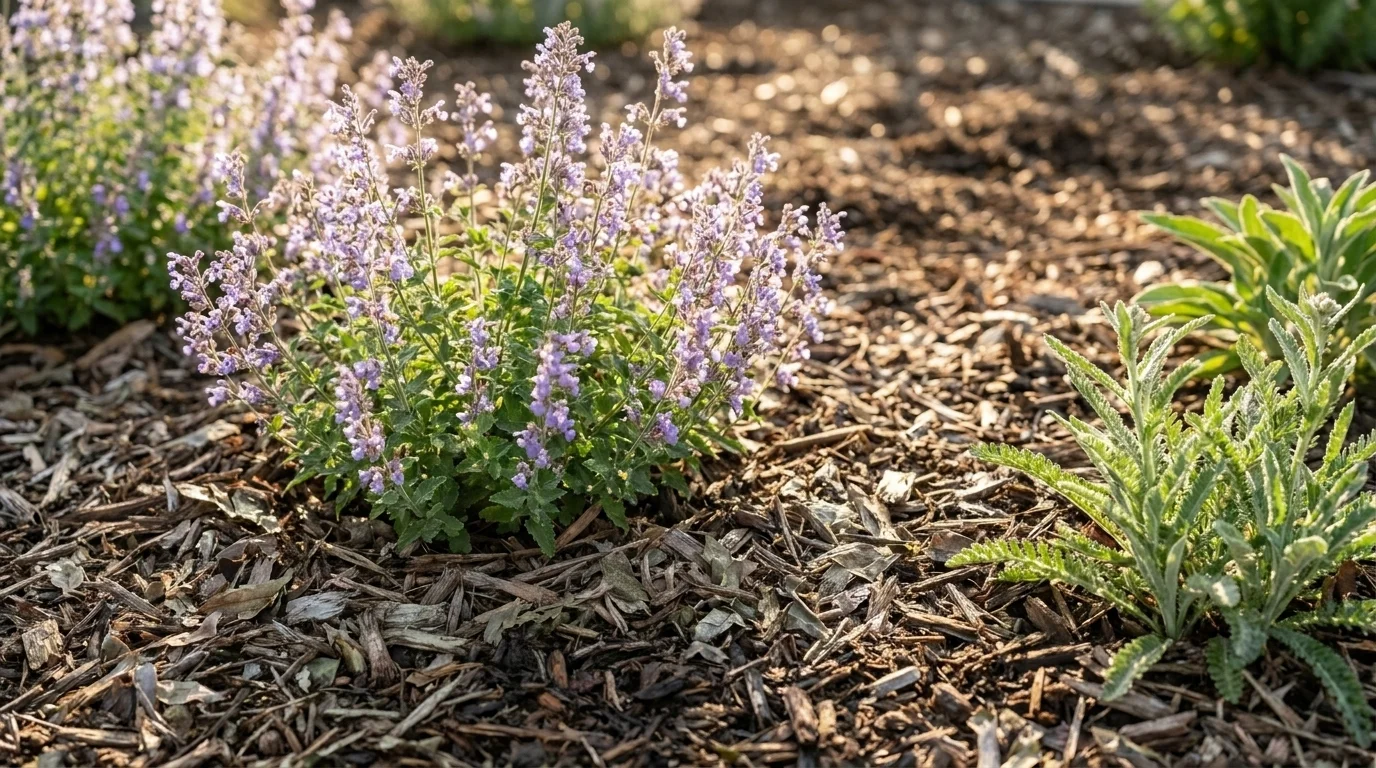
Drought-tolerant plants by USDA zone
The plant table below covers reliable drought-tolerant species across USDA zones 4 to 11, drawn from Epic Gardening's xeriscape-plant reference and adjacent extension sources. Choose two or three per layer (back, middle, front) and pair with regionally-native species — the local genetics are already adapted to your soil and rainfall, and they double as pollinator habitat.
Plant
Botanical name
USDA zones
Sun
Water need
Notes
Giant coneflower
Rudbeckia maxima
4–9
Full sun
Low
Architectural, tall, late-summer bloom
Russian sage
Perovskia atriplicifolia
4–9
Full sun
Very low
Lavender-blue haze, late summer
Yarrow
Achillea millefolium
3–9
Full sun
Low
Pollinator magnet, drought-tolerant
Catmint
Nepeta racemosa
3–8
Full sun to part
Low
Long flowering, soft purple haze
Black-eyed Susan
Rudbeckia hirta
3–7
Full sun
Low
Reliable, easy beginner
Sedum (autumn joy / 'Matrona')
Hylotelephium telephium
3–10
Full sun
Very low
Succulent, late-summer-to-autumn structure
Beaked yucca
Yucca rostrata
5–12
Full sun
Very low
Sculptural year-round form
Jerusalem sage
Phlomis fruticosa
7–10
Full sun
Low
Whorls of yellow flowers, evergreen base
Lavender (English)
Lavandula angustifolia
5–9
Full sun
Low
Aromatic, classic Mediterranean
Desert spoon
Dasylirion wheeleri
8–11
Full sun
Very low
Sculptural, hot dry sites
California tree poppy
Romneya coulteri
8–10
Full sun
Very low
Large white papery flowers, drought lover
Agave (small species, e.g., parryi)
Agave parryi
5–10
Full sun
Very low
Sculptural, cold-hardier than most agaves
Switchgrass
Panicum virgatum
5–9
Full to part sun
Low
Native grass, bird seed source
Little bluestem
Schizachyrium scoparium
3–9
Full sun
Low
Native prairie grass, autumn red colour
Crocodile aloe
Aloe broomii / A. striata
8–11
Full sun
Very low
Architectural, succulent
Note the USDA Plant Hardiness Zone Map was revised in November 2023, with about half the United States moving a half-zone warmer than the 2012 map. Recheck your zone before committing to a perennial — what was borderline in 2012 may now be reliable.
Loading image...
Choose two or three drought-tolerant species per layer — back, middle, front — and pair with regional natives the local rainfall already adapted.
Efficient irrigation: drip, soaker, and smart controllers
The three irrigation options for most home gardens:
System
Setup cost (typical)
Water savings vs. overhead sprinklers
Effort to install
Best for
Soaker hose
$15–$30 per 50 ft
~70%
Lay on bed surface; cover with mulch
Small beds, beginner installations
Drip line + emitters
$50–$150 per zone
~80%
Modest DIY half-day install
Most planted beds and shrub borders
Smart controller (WaterSense)
$150–$400
Up to 30% reduction on irrigation use; ~15,000 gal/year per home
Replace existing controller; setup
Any property with existing sprinkler zones
The smart-controller statistic deserves a second look. The EPA reports that a WaterSense-labeled smart irrigation controller saves the average home up to 15,000 gallons per year — about a 30 per cent reduction on a home's outdoor irrigation use, and the country-wide potential is roughly 390 billion gallons annually if every home with a sprinkler system adopted one. There are two technology paths: weather-based controllers that use local evapotranspiration data and weather forecasts to skip cycles, and soil-moisture-based controllers that use in-ground sensors to trigger zones only when the soil needs water. Some controllers are dual-certified. Specifying a WaterSense-labeled unit is the homeowner's job; the brand is secondary.
The cheapest first move is a $25 hose-end battery timer, which earns its keep within a single season on any garden that previously relied on hand-watering or "I'll do it when I remember."
Rainwater harvesting: the formula every household should know
The arithmetic of rainwater capture is short enough to write on the back of a seed packet:
A 1,000 sq ft roof during a 1-inch rain event captures 1,000 × 1 × 0.623 = 623 gallons. A typical 55-gallon barrel overflows after roughly the first eight or nine minutes of moderate rainfall. To actually store the capture from a single rainfall on a typical home, you would need three to four linked 50-gallon barrels per downspout, or a single 500-gallon cistern.
A 200 sq ft shed roof during a 0.5-inch rain event captures 200 × 0.5 × 0.623 = 62 gallons. A single 50-gallon barrel under that downspout is roughly correct for that capture, with a small overflow margin.
The barrel size most homeowners install — 50 to 75 gallons under a single downspout — is approximately right for a small shed and dramatically undersized for a house roof. Plan storage to the roof, not the other way round.
Setup cost: $80–$150 for a single 50-gallon barrel; $300–$700 for a 250–500 gallon cistern. Most of the savings come not from displaced municipal water (rainwater is too small a share of household consumption to move that bill significantly) but from having clean, chlorine-free water at the moment of greatest need — through summer drought, when the irrigation cost rises and the rain is least available.
Mulch: depth, type, and what it actually does
The mulch section is where most water-wise gardening guides go vague. The specifics:
Depth: 2 to 4 inches of organic mulch over the soil surface. Less than two inches and the moisture-retention and weed-suppression benefits drop sharply; more than four and you risk anaerobic conditions in the root zone.
Type: organic, not gravel-on-top-of-fabric. Shredded leaves, arborist wood chips, straw, and well-finished compost all work. Wood chips last longest; shredded leaves are ecologically most active; straw is best for vegetable beds. Avoid dyed bark; the dye does no harm to plants but contributes no useful organic matter as it breaks down.
Keep 2 inches off plant stems. Mulch piled against the trunks of trees and shrubs ("mulch volcanoes") holds moisture against the bark, encourages stem rot and rodent damage, and is one of the most reliable causes of premature tree death in suburban landscapes. The mulch ring should be a doughnut, not a cone.
Mulch reduces soil-surface evaporation by 25 to 50 per cent depending on conditions, moderates soil temperature in the root zone by several degrees Celsius, suppresses germinating weed seeds, and — by far the most important long-term effect — slowly decomposes into the upper soil profile, raising organic-matter content and water-holding capacity. The garden you do not need to re-mulch is a garden that has been left alone for too long.
Loading image...
Three inches of organic mulch, kept two inches clear of the stems. The mulch ring should be a doughnut, not a cone — every season, indefinitely.
Xeriscape ideas: seven design moves that work
A selection of design moves that lift a xeriscape from "drought planting" to "considered garden":
Layered succulents and textural grasses. Pair architectural succulents (yucca, agave, sedum) with the soft movement of ornamental grasses (panicum, schizachyrium). The contrast in form does most of the work.
Dry creek bed. A meandering swale of river stones (3–6 inches) and gravel, sometimes planted with rushes at its edges, that doubles as a stormwater drainage corridor during heavy rain. Practical and beautiful at once.
Decomposed-granite paths. Firm underfoot, permeable, low-maintenance. The current default surface in serious xeriscape designs from the Southwest and California.
Permeable pavers with planted joints. Concrete or stone pavers laid with one-inch gravel joints, planted with creeping thyme (Thymus serpyllum) or wooly thyme (T. pseudolanuginosus). The garden absorbs the rain it would otherwise lose to runoff.
Boulders and groupings of three. Large landscape stones (placed asymmetrically, in groups of three) anchor a planted area and provide thermal mass that warms the soil in spring and holds heat into autumn evenings.
Wildlife-pollinator overlap planting. Native flowering perennials drift through the xeriscape — coneflower, blazing star, milkweed — turning a water-saving garden into pollinator habitat. The two goals reinforce one another.
Outdoor lighting that respects the form. Low-voltage uplights placed at the base of architectural plants (yucca, agave, ornamental grasses) reveal the garden after dark. Use warm 2700K-3000K lamps rather than cool whites.
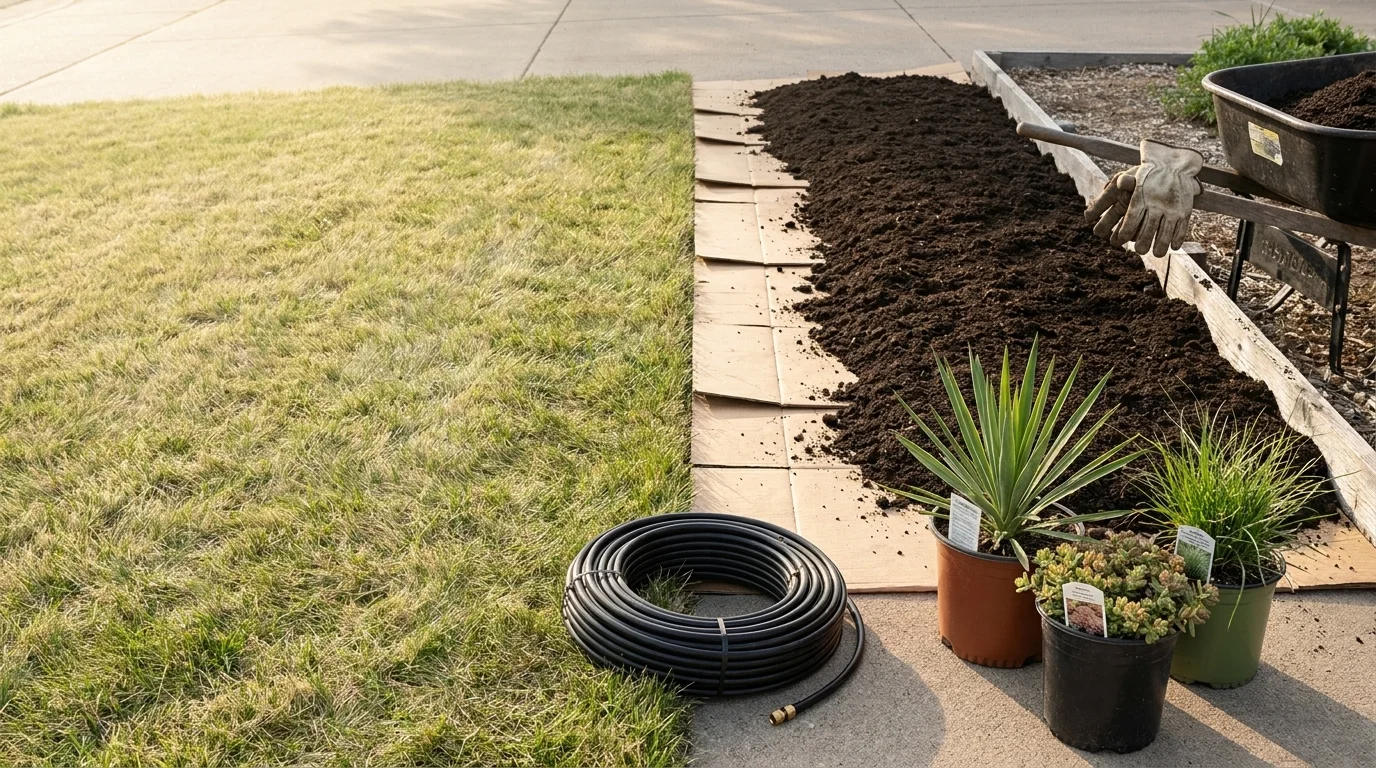
Step-by-step: from thirsty lawn to xeriscape
A workable project sequence for a typical front yard:
Survey (one weekend). Map sun exposure (note morning vs. afternoon sun), measure slope and drainage, dig two test holes to check soil texture and depth, photograph the existing planting through the seasons if possible.
Design (one week). Decide which areas keep some turf (a path, a sitting lawn) and which convert. Sketch the planting layout with the back-middle-front layers and the spacing the mature plants will need, not their nursery-pot size.
Prep (one weekend). Smother the existing lawn with cardboard topped with 4 inches of compost (sheet mulching) — no tilling necessary. Cardboard breaks down in three to six months; the grass below is dead and the soil structure intact.
Plant (one weekend per 200 sq ft). Position the architectural and structural plants first, then drift the medium plants between them, then plant the front-edge and ground-cover species. Water in.
Irrigate (one day). Lay drip lines or soaker hoses, with one emitter at the base of each newly planted perennial. Connect to a timer or smart controller. Run the system for the first six to eight weeks while plants establish, then taper.
Mulch (one afternoon). Two to four inches of shredded leaves or arborist chips over the whole planted area. Keep two inches clear of every plant stem.
Maintain (less than a lawn, not zero). Spot-water during establishment year. Top up the mulch each spring. Cut back herbaceous perennials in late winter. Leave seed heads for birds.
Five weekends, including the survey and design weekends — that is a realistic timeline for a single-zone front-yard conversion.
Loading image...
Smother the existing lawn with cardboard topped with four inches of compost. No tilling. The grass dies; the soil structure stays intact.
Rebates and incentives — check before you buy
Many US water utilities offer rebates on WaterSense-labeled smart irrigation controllers, on rainwater barrels and cisterns, and on turf-replacement programmes that pay homeowners directly for converting lawn to drought-tolerant landscape. Programmes are most active in the Southwest (Metropolitan Water District of Southern California, Las Vegas Valley Water District, Denver Water, Austin Water) but increasingly available across the Mountain West, Texas, and Florida.
The check is short: search "your water utility name rebates" before you buy the controller or the plants. Rebates often offset 25 to 75 per cent of equipment cost; some turf-replacement programmes pay $1 to $3 per square foot of lawn removed, which can offset a significant share of the planting budget.
A small diagnostic to close
Press a thumb into the soil in the spot where you intend to plant. Cool and firm — you are in good shape. Beads of water on a hydrophobic crust — top-dress with two inches of compost and wait a season before planting. A wet film — the drainage is the problem to solve first, not the plant list.
This weekend: walk the yard at 10 a.m., noon, and 2 p.m. Note where the direct sun falls and where it leaves. Most planting decisions resolve themselves once that map is drawn. The drought-tolerant species above are forgiving, but they cannot move; you can, and you should, before you reach for the spade.
A well-designed xeriscape uses 50–70% less water than a conventional lawn-dominated landscape. The EPA reports that swapping a clock-based sprinkler controller for a WaterSense-labeled smart controller alone saves the average home up to 15,000 gallons per year, and pairing that with drip irrigation in planting beds can cut bed-watering by another 80% versus overhead sprinklers.
What are the 7 principles of xeriscaping?
Planning and design, soil improvement, appropriate plant selection, practical turf areas, efficient irrigation, mulching, and appropriate maintenance. Together they form a checklist that turns a thirsty yard into a low-water landscape without sacrificing curb appeal.
How big a rain barrel do I need for my roof?
Multiply your drainage area (sq ft) by rainfall (inches) and by 0.623 — that is the gallons captured. A 1-inch rain on a 1,000 sq ft roof yields 623 gallons, which overflows a typical 55-gallon barrel many times over. For most homes, linking two or three 50–75 gallon barrels per downspout (or stepping up to a 250–500 gallon tank) is more realistic than one small barrel.
Drip irrigation vs. a smart sprinkler controller — which should I install first?
If you still have a lawn or in-ground sprinkler zones, a WaterSense-labeled smart controller is the higher-leverage first move (up to 15,000 gallons saved per home per year, often rebate-eligible). If your watering is mostly garden beds, install drip lines first — drip uses roughly 80% less water than overhead sprinklers and works on a $25 hose timer.
What drought-tolerant plants work in my USDA zone?
Match plants to your zone: Giant coneflower (zones 4–9), Beaked yucca (5–12), Russian sage (4–9), Jerusalem sage (7–10), Desert spoon (8–11), and ornamental grasses such as switchgrass (5–9) and little bluestem (3–9) span most of the continental US. Pair these drought-tolerant species with regional natives — they are already adapted to your soil and rainfall and double as pollinator habitat.
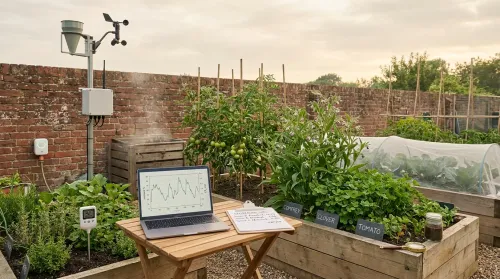
Revolutionizing Traditional Gardening with Smart Technology and Gadgets
Join
Loading...
Our Green Community!
Loading...
VerdeNook is more than just a source of gardening wisdom; it’s a platform for sharing, learning, and growing together. We invite you to join our community, share your stories, and spread the joy of gardening. Let’s sow the seeds for a greener, healthier, and more sustainable future, one garden at a time.