Exploring Vertical Gardening: Creative Ways to Grow More in Less Space
Share this article:
Vertical gardening on a tight site is not scaled-down suburban gardening; it is its own discipline. The constraint is square footage — go up.
My balcony in Toronto is forty-two square feet, faces north-east, gets three hours and twenty minutes of direct sun in June, and the lake throws cross-winds that have demolished two trellises and one cocky pepper plant. By the conventional wisdom, none of that should support a vertical garden. By actual measurement, it produces twenty-one pounds of leafy greens, herbs, and bush beans a season and a single annoyingly productive cherry tomato. Vertical gardening on a tight site is not scaled-down suburban gardening — it is its own discipline.
Done thoughtfully, vertical gardening can substantially expand usable growing area within the same footprint, improve air circulation around plants, and turn walls, railings, and corners into productive surface. Done carelessly, it falls off a wall in the second rainstorm or fries the lettuce in the first week of August. This guide is the version I wish I had read before I bought my first set of cheap pocket planters off a clearance shelf years ago — what works, what costs what, and what to spend the next twenty dollars on.
Vertical gardening: what it is, what it isn't
Vertical gardening is any system that grows plants stacked upward instead of laid out — a trellis with vining tomatoes is the simplest case; a hydroponic tower or a fully planted living wall sits at the other end. The case for it is straightforward: in urban housing, the constraint is square footage, and going vertical buys you growing surface without paying rent on additional ground.
What it is not: a free upgrade. Vertical setups dry out faster (gravity pulls water down; exposed sides evaporate), require structural attention (a saturated wall planter can weigh more than the wall expects), and force harder choices about plant placement (the top tier and the bottom tier may as well be different climates). The trade-offs are worth it for most urban growers. Pretending the trade-offs don't exist is what kills first-year setups.
How much weight can your wall hold?
This is the question most beginner guides skip, and it is the one that will most reliably ruin a weekend. The numbers that matter:
A planted 40×48 in pallet weighs 100–150 lbs wet, or roughly 8–12 lbs/sq ft (Blooming Expert pallet DIY).
An off-the-shelf 4-tier pocket planter holds 44–70 lbs loaded — useful as the "what off-the-shelf can take" benchmark.
The mount itself has a standard, also from Blooming Expert's pallet guide: two 3-inch L-brackets per stud, four brackets total on a 40-inch-wide pallet (US-standard 16-inch stud spacing), and a waterproof membrane between the planter and the wall. The membrane is non-negotiable on any exterior siding, drywall, or unsealed masonry — trapped moisture against the wall causes rot, paint failure, and (in worst cases) framing damage that comes back to haunt the renter at the end of the lease.
If you're renting and cannot drill, freestanding A-frames and pocket-planters on a stand are the only safe option. Anything wall-mounted in a rental is the landlord's decision, not yours, and the cheerful Instagram videos that pretend otherwise are not the people who get the security deposit back.
Vertical garden systems compared
Most beginner content treats "trellis or hydroponic tower" as the only choice. There are five distinct categories, with very different price tags, maintenance loads, and crop fit. The table below summarises the trade-offs.
System
Typical cost (DIY/kit)
Power needed
Maintenance
Best crops
Footprint
Trellis / arch
$15–$60 DIY; $80–$200 kit
None
Low — water + ties
Vining edibles (tomato, cucumber, bean, pea)
Existing bed; goes up
Pallet / pocket planter
$15–$50 DIY; $80–$200 kit
None
Medium — daily summer water
Herbs, lettuces, strawberries, succulents
4×4 ft of wall
Wick hydroponic
$25–$60 DIY
None
Low — top-up reservoir weekly
Lettuce, herbs, leafy greens
Counter/shelf
Drip / NFT hydro
$200–$500
Low (pump + timer)
Medium — pump maintenance, pH check
Fruiting vines, herbs, peppers
4×4 ft footprint
Vertical tower (recirculating NFT/aero)
$300–$700
Low (pump)
Medium — clean monthly
Lettuce, herbs, strawberries (20–50 plants per tower)
2×2 ft footprint
A few cautions from the table that don't come through in a row of cells. Drip systems are sensitive to clogged emitters; check them weekly. Wick systems are the easiest entry to passive hydroponics — the Kratky method, developed at the University of Hawaii, is essentially a wick system without the wick — but they cap out at about a square foot of lettuce per reservoir. Vertical towers are the highest-throughput option in the smallest footprint, but the pumps and air stones add a real maintenance overhead. Don't buy one if you travel for more than a fortnight at a time without a sitter.
Three DIY tiers: budget, mid, premium
Each of these is a project I have built (or watched a client build) in the last three years. Costs are in 2026 USD, sourced from the Gardenary pricing notes and the urban-grower network in Toronto where I work.
Tier 1 — Budget pallet wall ($15–$50)
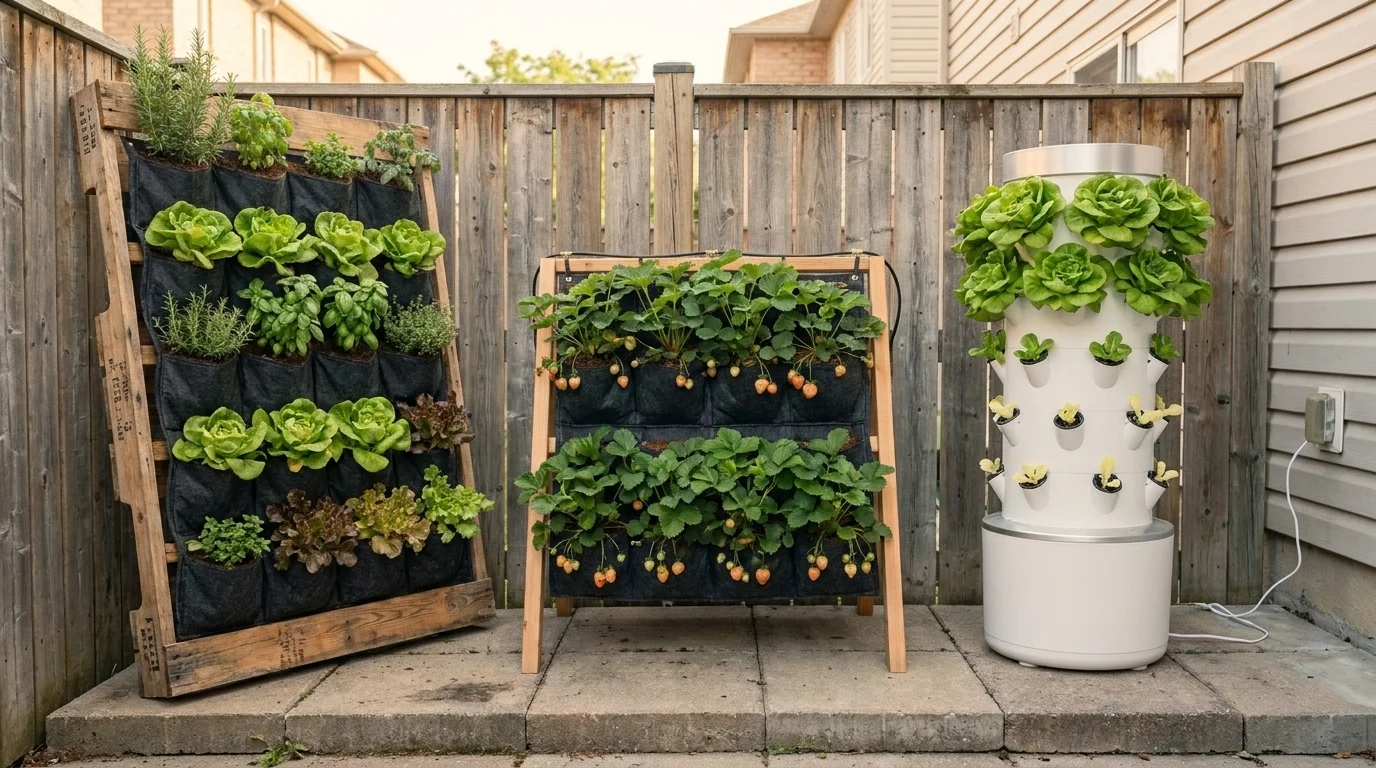
A 40×48 in heat-treated pallet (look for the "HT" stamp; avoid "MB" methyl bromide), eight to twelve square feet of landscape fabric for the pocket linings, a roll of staples, and a 6-mil plastic membrane to go between the pallet and the wall. Materials: under $30 if you scavenge the pallet. Build time: one afternoon. Weight planted: 100–150 lbs wet — make sure your mount can take it (see the weight & mounting section above).
Lined with landscape fabric and filled with a 60/30/10 mix (topsoil/compost/perlite, same recipe I use everywhere), a pallet holds 10–14 herb or lettuce plants. Drain holes at every pocket are mandatory; without them the lower pockets stay anaerobic and the roots rot.
Tier 2 — Modular pocket-planter or fabric living wall ($80–$200)
Off-the-shelf 4-tier pocket walls hold 44–70 lbs loaded and ship with eyelet hangers that mount on the same L-bracket/stud spec as the pallet. The advantages over a pallet: cleaner aesthetics, professional drainage, and removable pockets that let you swap plants without dismantling the whole wall. The disadvantages: lower planting density, and the polyester fabric breaks down in UV after three to five years outdoors.
For renter-safe deployment, mount the same pocket system on a freestanding cedar A-frame instead of a wall — total project cost stays under $200 and the frame moves when you do.
Tier 3 — Hydroponic tower ($300–$700)
Freestanding recirculating-NFT towers hold 20–50 plants in a 2×2 ft footprint (Vixtert 2026 outdoor trends). For a single tower with pump, basket inserts, lights (if indoors), and the first round of nutrient solution, expect $300 for an entry kit and $500–$700 for a setup that will run year-round indoors. Energy cost is modest — the pump runs intermittently — but the lighting bill on an indoor tower can match the cost of the unit itself within a year if you skimp on LED efficiency.
Best fit: lettuce, basil, mint, and other fast-cycle leafy crops where the throughput justifies the maintenance. Worst fit: fruiting crops that need three months to set a single tomato; the math doesn't work.
Loading image...
The wrong system isn't usually the wrong shape; it's the one that demands more maintenance than your actual Tuesday schedule will tolerate.
Plant selection: matching crops to systems
Not every plant belongs on a vertical surface. Vining and rosette-forming crops thrive; deep-rooted crops (carrots, parsnips, potatoes) emphatically do not. The categories below cover most of what works.
Category
Best examples
Sun (hours)
Watering
Best system
Vining edibles
Tomato, cucumber, pole bean, pea, melon (small), squash (small)
6–8 full sun
Deep, 2–3×/wk
Trellis or arch over a bed
Herbs
Basil, mint (contained), thyme, oregano, parsley, chives
Sedum, echeveria, Tillandsia, Senecio rowleyanus (string of pearls)
Indirect bright
Weekly mist
Pocket planter, vertical succulent panel
Flowering climbers
Sweet pea, morning glory, nasturtium, clematis
5–8 full sun
2–3×/wk
Trellis, arch, balcony cable system
Shade-tolerant trailers (indoor)
Pothos, English ivy, philodendron, spider plant
Indirect medium
Weekly
Pocket planter, hanging column
Pair plants on the same tier by water demand, not by aesthetic appeal alone — putting a mint on the same drip line as a succulent is a fast route to rotted roots in one pot and dehydrated leaves in the other.
Indoor vertical gardens: light, humidity, plant fit
The single most useful number for an indoor vertical garden is foot-candles at the planted surface. Most beginner guides skip it entirely; the SERP rewards a guide that doesn't.
A useful three-tier light spec:
Tier 1 — South-facing window, no supplemental light: roughly 2,000–4,000 foot-candles at the glass on a bright day, dropping fast within three feet of the window. Supports vining edibles, herbs, strawberries. The top tier of a tall planter gets most of the light; the bottom may be dim enough to stunt growth.
Tier 2 — East- or west-facing window: 1,000–2,000 foot-candles. Leafy greens, herbs, shade-tolerant trailers. Fruiting crops will struggle without supplemental light.
Tier 3 — North-facing or interior wall: under 500 foot-candles. Requires supplemental LED grow lights — budget 20–30 watts per square foot of grow area for leafy greens, 30–50 watts/sq ft for fruiting plants.
Humidity matters too. Indoor air in winter drops below 30 per cent relative humidity in most heated apartments, which most leafy greens tolerate but which crucifies basil and seedlings. An inexpensive evaporative tray, or simply a wide saucer of water under the planter, raises local humidity a few percentage points without any electronics.
Watering: the smart-irrigation upgrade path
The simplest vertical-garden mistake is hand-watering, because gravity and exposed surfaces mean the top tier dries before the bottom tier finishes draining. A three-stage upgrade path solves this:
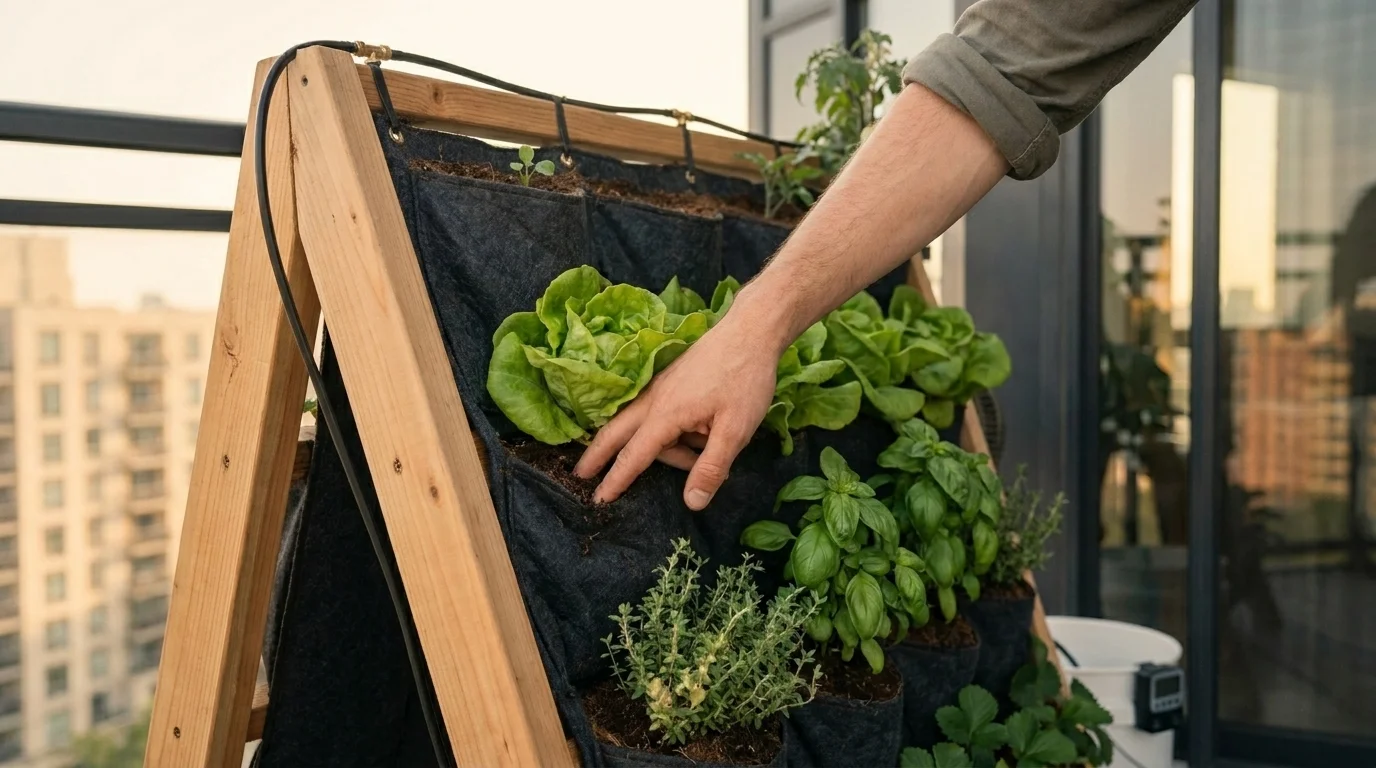
Timer-driven gravity drip ($25–$50). A 5-gallon reservoir, a battery timer, and a length of half-inch drip line with emitters at each plant. Twice-daily irrigation in summer, once daily in spring and autumn, off in winter. This is the minimum viable setup for any pallet or pocket-planter wall in an outdoor location.
Moisture-sensor-driven drip ($60–$120). Adds a soil moisture probe that holds back water when the substrate is still wet. Reduces overwatering on cool, overcast days when the timer would otherwise dump 5 gallons into a wall that doesn't need it.
App-connected smart system ($120–$300). Wi-Fi, weather forecast integration, leak detection. Worth it if you travel; overkill if you don't.
For all three stages, the rule is the same: water the substrate, not the leaves. Foliar irrigation in a vertical setup wastes water to evaporation and invites fungal disease in tight planting density.
Loading image...
Vertical setups dry top-down. Drip lines with emitters at each pocket and a small reservoir on a timer make hand-watering an option, not a requirement.
Maximising sunlight without burning the harvest
The conventional advice is "more sun is always better." On a hot roof in July, a north-facing wall is a feature, not a bug — lettuce bolts hard above 75°F and any direct afternoon sun on a metal balcony becomes a problem rather than a help.
A workable rule: site the vertical garden where it gets four to six hours of direct sun in the morning, ideally with afternoon shade. East- or south-east-facing walls in temperate latitudes are the goldilocks position. South-facing walls work but require shade cloth (a 30–50 per cent shade screen, sized for a typical 6×8 ft sheet) during summer heatwaves. West-facing walls fry late-day, every day, in July and August; reserve those for drought-tolerant succulents and air plants.
Airflow matters as much as light in dense planting. A small clip-on USB fan, inexpensive at any hardware shop, running on low for two hours a day, reduces fungal disease pressure and strengthens the stems on leafy greens. The fan is the most underrated tool in vertical gardening; it pays for itself in the first season.
10 vertical garden ideas to start with
A quick gallery of project briefs, scaled to a single afternoon each:
Kitchen herb wall — six basil, parsley, thyme, mint, chive, oregano plants in a $25 pocket planter, mounted inside on a freestanding A-frame with a clip-on grow light.
Pallet strawberry tower — a heat-treated pallet, twelve 'Albion' or 'Mara des Bois' strawberry plants in the pockets, on a south-east exterior wall with drip irrigation.
Balcony tomato + nasturtium arch — a $30 cattle-panel arch over a railing-mounted bed, one indeterminate tomato, two nasturtium for pollinators.
Indoor pothos column — a moss pole or coir column ($20), three pothos cuttings rooted from a friend's plant, a sunny east window.
Hydroponic lettuce tower — a $300 entry-level NFT tower, 20 buttercrunch lettuce starts, in a basement under LEDs.
Window-box salad bar — three 18-in window boxes stacked on a freestanding three-tier metal frame, sown with mixed cut-and-come-again lettuces, hand-watered.
Kratky-jar herb station — a row of repurposed pickle jars, basil and lettuce starts in net pots, no pump, no electricity after the LED is plugged in.
Cucumber A-frame — a freestanding wooden A-frame in a single raised bed, two cucumber plants, vining up and down both sides.
Succulent picture frame — a shallow wooden frame, hardware cloth backing, sphagnum moss, twenty plug-size succulents pressed into the moss. Indoors, low-water, mounted with a French cleat.
Bean trellis cage — a 6×4 ft welded-wire panel ($35 from Gardenary's pricing) wired between two T-posts in an existing bed, pole beans climbing both sides, doubles as a privacy screen.
What to do this weekend
Pick the lowest-friction one of the above that matches your site and skill level. The most common failure mode in vertical gardening is not buying the wrong system — it is buying a system that requires more maintenance than your actual schedule will tolerate. The pallet wall I built years back was the wrong system for me; the wick-hydro pickle-jar station I started a month later is still running, six years on, because it asks nothing of me on a Tuesday night.
Total cost of any of the ten projects above: a modest weekend-project budget in materials, one to three weekends of effort, zero permanent holes in the wall if you choose carefully. That is what a vertical garden costs to start, and the rest is whatever happens after you start watering.
How much weight can a wall-mounted vertical garden hold?
A saturated living-wall panel weighs roughly 15–25 lbs per square foot, with poorly drained systems reaching 40 lbs/sq ft. Mount into wall studs on US-standard 16-inch spacing using 3-inch L-brackets (two per stud, four total), and install a waterproof membrane between planter and wall to prevent rot.
What's the difference between NFT, drip, wick, and tower hydroponic systems?
NFT runs a thin film of nutrient solution over the roots — best for leafy greens. Drip systems deliver water through emitters to each plant — best for fruiting vines but prone to clogged emitters. Wick systems use capillary action with no pump — simplest, best for herbs. Vertical towers stack 20–50 plants in one footprint with recirculating water — best for mixed leafy crops in tight spaces.
How much does a vertical garden cost to build?
Budget pallet builds run $15–$50, modular pocket-planter kits run $80–$200, and freestanding hydroponic towers run $300–$700 before plants and nutrients. DIY trellis materials (welded wire, T-posts, chicken wire) total $30–$60 for a six-foot section.
Can I grow a vertical garden indoors?
Yes. A south-facing window supports vining edibles and most herbs. East- or west-facing windows handle leafy greens and shade-tolerant trailing plants. Any other position needs supplemental grow lights — 20–30 watts per square foot of grow area for leafy greens, 30–50 watts/sq ft for fruiting plants.
How often do vertical gardens need watering?
Vertical setups dry faster than ground beds because gravity pulls water down and exposed sides increase evaporation. Most outdoor vertical gardens need watering once or twice daily in summer, which is why drip irrigation on a timer is the standard answer rather than hand-watering.
What plants grow best in a vertical garden?
Vining edibles (tomatoes, cucumbers, pole beans, peas), herbs (basil, mint, thyme, oregano), leafy greens (lettuce, spinach, kale), strawberries, succulents and air plants, and shade-tolerant trailers like pothos and English ivy. Match plant water needs across each tier so one irrigation schedule serves the whole wall.
Do vertical gardens damage walls?
Only if installed without a moisture barrier. Trapped moisture against siding, drywall, or unsealed masonry causes rot, mould, and paint failure. Use a waterproof membrane between any planted system and the wall surface, and prefer freestanding or stand-off-mounted designs for interior installations.
Join
Loading...
Our Green Community!
Loading...
VerdeNook is more than just a source of gardening wisdom; it’s a platform for sharing, learning, and growing together. We invite you to join our community, share your stories, and spread the joy of gardening. Let’s sow the seeds for a greener, healthier, and more sustainable future, one garden at a time.