10 Essential Tips for Growing Healthy Organic Vegetables in Your Home Garden
Share this article:
Organic vegetable gardening is the practice of keeping a living soil community at work long enough that it outperforms the bag of synthetic fertiliser.
Pull up a courgette plant in late June and shake the soil from its roots over a sheet of newspaper. What falls out is not soil in any honest sense — it is a community. Bacterial colonies cling to the root surface, fungal hyphae trace fine white threads back into the dark, and the structure between them is held open by the casts of earthworms that came through last winter. Organic vegetable gardening is the practice of keeping that community alive long enough that it does the work the bag of inorganic fertiliser was meant to do, and rather better.
This guide is for the home grower who wants the mechanism, not the slogan. We will cover ten essential tips — soil and compost first, because everything depends on them, then site and sun, seed and cultivar, pest and water, raised beds and harvest. Where a number matters, I will give it. Where a study settles a question, I will name it.
1. Begin with the soil, not the seed
Most failed vegetable beds were settled before the first seed went in, by a soil that was either too compacted, too hungry, or both. The single most useful question you can ask before sowing is: when you press a thumb into the surface, what happens? If the print holds sharp edges and feels cool, the soil is at or near field capacity and has enough crumb structure to admit air and water. If it beads and refuses the impression, the surface has gone hydrophobic and the pore space has collapsed. If your thumb sinks into a wet film, the bed is waterlogged and the roots are running anaerobic. The first job in any organic vegetable garden is to learn what each of those three feels like.
The fix in nearly every case is the same: organic matter, applied as a mulch on the surface, every season, indefinitely. The fungal hyphae and bacterial communities that build soil structure are fed by what is rotting on top, not what is mixed in below. This is also why the no-dig beds at Charles Dowding's trial plots in Somerset consistently outperform dug beds on identical soil — not because digging is morally wrong, but because the biology never gets long enough to settle.
2. Composting for your vegetable garden — the engine room
A finished compost heap is the single most useful thing a home grower can produce, and most heaps fail in the same two ways: they are too wet and too rich in nitrogen, or too dry and too rich in carbon. The arithmetic that decides which way a heap is leaning is the carbon-to-nitrogen ratio (C:N).
The target, by weight, is roughly 25:1 to 30:1 — that is the band in which the mesophilic and thermophilic microbes work efficiently and the pile heats steadily without going sour (Garden Myths). The trouble is that home gardeners do not weigh feedstocks; we measure by volume in barrowloads and buckets. The translation is the canonical thumb rule: aim for roughly three parts browns to one part greens by volume (Help Me Compost). For most household feedstocks, that volume ratio lands the pile inside the 25:1–30:1 target.
To use the thumb rule, it helps to know where common materials actually sit on the C:N scale. The figures below are taken from Touchwood Editions' composting reference:
Feedstock
Approx. C:N
Category
Notes
Sawdust
325:1
Brown
Very high carbon — bulks up wet, nitrogen-rich heaps
Shredded newspaper
175:1
Brown
Convenient bulk for kitchen-scrap-dominant piles
Straw
75:1
Brown
Classic structural brown
Dried autumn leaves
60:1
Brown
The home gardener's most reliable autumn input
Vegetable scraps
25:1
Green
The most common kitchen feedstock
Grass clippings
20:1
Green
Hot, nitrogen-rich — easy to overdose
Coffee grounds
~20:1
Green
Counts as a green despite the colour
Aged manure (herbivore)
15:1
Green
Use sparingly; pile heats fast
Hot or cold — pick a method and stay with it
Hot composting (turned, monitored, 55–65°C / 130–150°F core temperature) finishes in eight to twelve weeks and kills most weed seeds and pathogens. Cold composting (unturned, ambient) takes six to twelve months but asks nothing of the gardener beyond adding material. There is no reason a household cannot run both: a hot heap for the season's heavy feedstocks and a slow cold heap for whatever is left over.
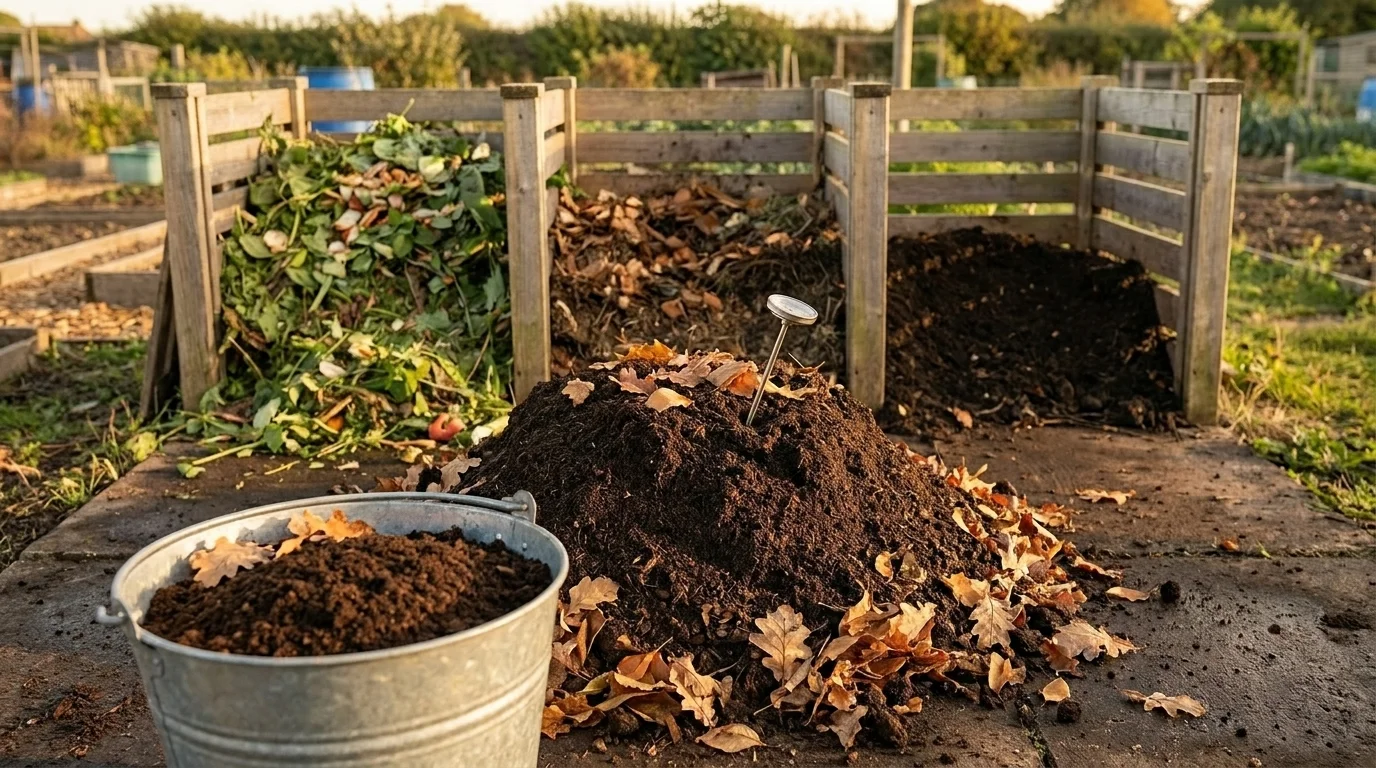
The diagnostic for "is it done" is not the smell. Pick up a handful of compost. Finished compost holds together under light pressure and then falls apart cleanly when you open your fingers; it should feel cool, not warm, and the temperature at the centre of the heap should match the air within two degrees. A probe thermometer costs less than a decent pair of secateurs and saves a season of guessing. If the pile is still running at thirty-five degrees Celsius in late autumn, the microbes are still working — give them another four weeks before you spread it on the beds.
When something goes wrong
Symptom
What it usually means
Fix
Smells of ammonia
Too many greens; C:N below 20:1
Add a thick layer of dried leaves or shredded paper; mix in
Pile fails to heat
Too dry, too small, or too few greens
Water until lightly moist; bulk the heap to at least 1 m³; add greens
Slimy, anaerobic, sour smell
Compacted, airless, waterlogged
Turn the heap; add coarse brown material (straw, twiggy prunings)
Attracts rats
Cooked food or dairy in the mix
Bury food scraps under 4 in / 10 cm of browns, or switch to a sealed bin
Loading image...
Compost is finished when it cools to air temperature and the crumb falls cleanly through your fingers. The probe thermometer settles the question.
3. Choose a site that gives you six to eight hours of direct sun
Most vegetables — including all of the tomato, pepper, courgette, and bean families — need six to eight hours of unobstructed direct sun every day during the growing season. This figure is unchanged across the 2025–2026 cooperative extension consensus and is the single non-negotiable in vegetable siting.
Sheltered from prevailing wind, close enough to a tap or rainwater butt that watering is not an excuse to skip a day, and on ground that drains: those are the other three site qualities worth checking before you commit a bed. A starter footprint of fifty to a hundred square feet per household member is a sensible target (USDA — Tips for Starting an Organic Garden); larger plots become labour traps faster than people expect.
4. Use raised beds where the ground will not cooperate
A standard raised bed gives the home gardener three things at once: drainage, soil control, and a back that has bent less by the end of the day. The default 2026 frame for new vegetable gardens, across the major extension services and editorial pillars, is raised beds first, in-ground beds second.
A workable starting dimension is 4 ft wide × 6–8 ft long × 12–18 in deep (roughly 1.2 m × 1.8–2.4 m × 30–45 cm). Cedar or larch lasts the longest untreated; pine treated with a food-safe stain or a layer of plastic between the wood and the soil is the most common compromise; galvanised steel troughs are the modern, popular, and durable option. Avoid old railway sleepers (creosote) and pressure-treated CCA timber.
For the soil to fill that bed, the most reliable starting mix is 60 per cent topsoil, 30 per cent compost, 10 per cent perlite or coarse sand (UMN Extension — Sustainable gardening trends for 2026). Top up the compost layer every spring as the level settles; the topsoil holds the structure, the compost feeds the biology, and the perlite or sand keeps the drainage honest.
5. Select organic seed, and name the cultivar
Generic advice to "choose organic seed" is true and underspecified. What matters is matching the cultivar to your climate, season length, and household appetite. The table below is a tested beginner mix that survives most kinds of imperfect management. The first three are reliable across most temperate growing zones; the cherry tomato and the bush bean are the workhorses of the snack-garden frame that has been ascendant in 2026 container-garden coverage (Contained Creations).
Crop
Beginner-friendly cultivar
Days to harvest
Sun
Notes
Cherry tomato
'Sungold' or 'Cherokee Purple' (full-size)
60–75
Full sun
Stake or cage; bury seedling stem deep at transplant
Bush bean
'Provider'
50–55
Full sun
Direct-sow after last frost; succession every 14 days
Courgette
'Black Beauty'
50–60
Full sun
One plant per household; thumb every fruit at 8 in
Lettuce
'Buttercrunch'
50–55
Sun to part shade
Sow successively; bolts in heat
Radish
'French Breakfast'
25–30
Full sun
The first crop of the year; soak seeds overnight
Sugar snap pea
'Sugar Snap'
60–65
Sun to part shade
Trellis up early; sow at 5°C soil temp upward
For gardeners in warming zones (most of the continental United States is now half a step warmer under the 2023 USDA revision), heat-tolerant tomato cultivars such as 'Heatmaster' and 'Solar Fire' are bred to set fruit above 32°C / 90°F and are worth substituting for the standard 'Cherokee Purple' if your summers regularly push past that line (Vegplotter — Climate-Resilient Vegetable Garden 2026).
6. Organic pest control — name the spray, name the insect
Organic does not mean unsprayed; it means the spray is from a known, low-residue source. The reference list for home gardeners is the OMRI-listed product directory, which is the certification most commercial organic growers operate under (Arbico Organics; Plantophiles).
The shortlist below covers most home-garden problems:
OMRI-listed product
Active ingredient
Targets
Notes
BT (e.g., Bonide Captain Jack's)
Bacillus thuringiensis
Cabbage white caterpillars, tomato hornworm
Specific to lepidoptera larvae; harmless to bees
Spinosad (e.g., Monterey Spinosad)
Spinosad
Thrips, beetles, leaf miners, fruit flies
Spray at dusk — toxic to bees while wet, safe once dry
Neem oil 70%
Azadirachtin (cold-pressed)
Aphids, whiteflies, mealybugs, spider mites
Coverage matters; reapply weekly until populations crash
Insecticidal soap
Potassium salts of fatty acids
Aphids, mites, whiteflies (contact-only)
Cheap, gentle; rinse leaves the next morning
Earth's Ally 3-in-1
Rosemary, peppermint, clove oil
Light pest pressure across multiple species
Useful as a tank-mix preventive, weaker than the others alone
The cheaper and more durable layer underneath the spray bottle is the habitat that brings in the predators. The matrix below is the standard set of beneficial insects and the flowering plants that reliably draw them:
Beneficial insect
What it eats
Attractant plants
Ladybirds (lady beetles)
Aphids, mites, scale
Yarrow, dill, fennel
Lacewings
Aphids, mealybugs, whitefly larvae
Cosmos, coreopsis
Parasitic wasps
Caterpillars, aphids, whitefly
Sweet alyssum, flowering cilantro
Hoverflies
Aphids
Calendula, dill, marigold
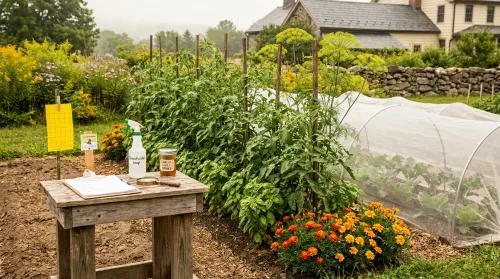
A vegetable garden ringed with sweet alyssum, cosmos, and calendula will need substantially less spraying than the same garden without them — not because the pests are absent, but because the predators arrived first.
Loading image...
A vegetable bed ringed with yarrow, cosmos, and calendula sprays less than the bed without them — because the predators arrived first.
7. Water the soil, not the leaf
Most vegetables need consistent moisture during the growing season, which is not the same as daily watering. The reliable method is to deliver water to the root zone — drip line, soaker hose, or a slow watering can to the base of the plant — and then to leave the bed alone until the surface goes pale and the thumb test starts to come up dry. Overhead watering wets the foliage, encourages fungal disease, and loses a sizeable share of the water to evaporation before any of it reaches a root hair.
Containers are the exception: their volume is small, their drainage is fast, and they often need watering twice a day at the height of summer.
8. Plant compactly and plan for vertical space
Most vegetable beds run out of horizontal space before they run out of vegetation that wants to grow. Vining crops (cucumbers, beans, peas, indeterminate tomatoes, even some winter squash) are happier on a trellis than spreading across a bed, and the bed underneath is freed for lettuce, radish, or a low-growing herb that benefits from the partial shade. A 6-foot cattle-panel arch between two raised beds will support sixty pounds of climbing crop and the readers under it.
Interplanting compatible crops in the same bed — the classic example is carrots with onions, which suppress each other's fly pests — extends the principle. The point is not to maximise the number of species in a square metre; the point is to keep something productive growing in every part of the bed at every part of the season.
9. Harvest at peak ripeness, store with intent
A tomato picked underripe will redden on a counter but will never reach the flavour of one picked at full vine-ripe; a courgette left a week too long becomes a marrow that is fit only for bread. Pay attention to the moment a crop is at its best and pick aggressively when it is — even if it means having three days of courgette in the kitchen at once. The plant responds to harvest by setting more fruit; refusing to pick costs you the next round.
For storage, the brief rules are: tomatoes, never below 12°C (54°F) — the refrigerator destroys their flavour; root crops, dry-cured then stored at 4°C (40°F) in damp sand or sawdust; alliums and winter squash, dry-cured then stored cool and dry with airflow. Anything you cannot store at peak quality, freeze, ferment, or share with the neighbour whose roses you admired in May.
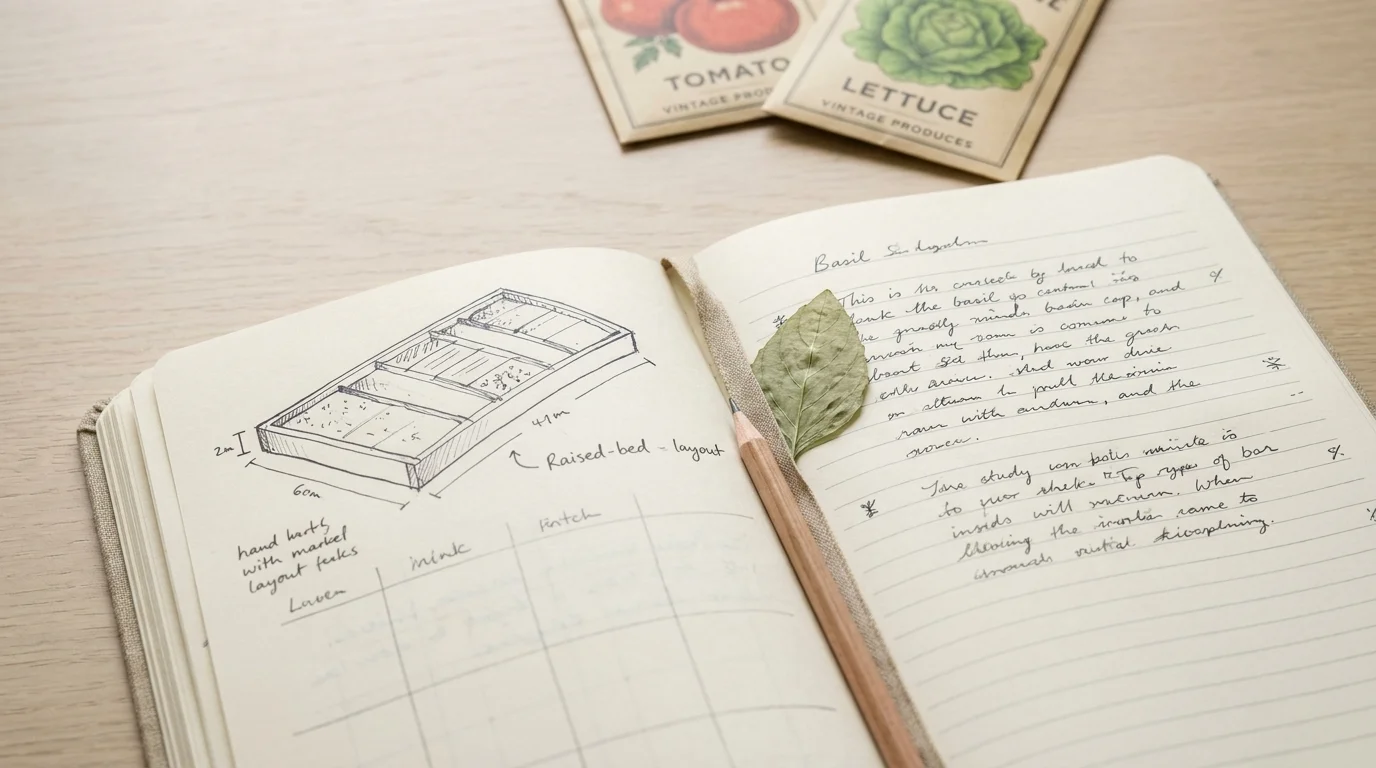
10. Keep a notebook — every season teaches you a different lesson
The last and most underrated tip is to keep a one-page record per season: what you planted where, when you sowed, when you harvested, what failed, and what the weather did. Three seasons of those notes will tell you more about your particular plot than any guide can. The Heritage Seed Library cooperative I worked with in Suffolk ran a trialling protocol that boiled down to roughly that: plant the variety, write down what happened, repeat for three seasons before drawing any conclusion. The principle scales down to a kitchen-table notebook.
Loading image...
Three seasons of notes will tell you more about your plot than any guide can. The notebook is the cheapest tool in the garden.
A small diagnostic to close
Pick up a handful of finished compost from your heap, hold it for ten seconds, and let it fall through your fingers. Cool, crumbly, dark, with the faint smell of forest floor — the season ahead will largely take care of itself. Warm, slimy, ammonia in the nostrils — turn the heap, add browns, and try again next month. The vegetable garden is not a separate object from the compost heap; it is what the compost heap eventually becomes.
Organic vegetable gardening is the practice of growing food without synthetic fertilisers, pesticides, or genetically modified seed, by feeding the soil biology that does the work in their place. Key practices are composting kitchen and garden waste, choosing OMRI-listed inputs only when needed, attracting beneficial insects with flowering companion plants, and minimising disturbance to soil structure.
What's the easiest organic vegetable for beginners to grow?
Cherry tomatoes ('Sungold'), leaf lettuce ('Buttercrunch'), bush beans ('Provider'), and radishes ('French Breakfast') are the most forgiving beginner crops. They tolerate imperfect soil, mature in 25–60 days, and recover well from minor pest or watering mistakes.
What is the ideal compost ratio for a vegetable garden?
Aim for a carbon-to-nitrogen (C:N) ratio of 25:1 to 30:1 by weight, which translates to roughly three parts browns (dried leaves, straw, shredded paper) to one part greens (kitchen scraps, grass clippings, manure) by volume. This balance keeps the pile heating, prevents odours, and produces finished compost in two to three months for hot heaps or six to twelve months for cold ones.
Do I need raised beds for an organic vegetable garden?
No, but raised beds make organic gardening easier. They improve drainage, warm faster in spring, give full control over soil composition, and reduce weed pressure. A 4 ft × 6–8 ft bed, 12–18 in deep, filled with 60 per cent topsoil, 30 per cent compost, and 10 per cent perlite or coarse sand is the most reliable starting setup.
What are the best OMRI-listed organic pest sprays for vegetables?
The core OMRI-listed toolkit is Bacillus thuringiensis (BT) for caterpillars and cabbage worms, Spinosad for thrips and beetles, neem oil 70% for aphids and whiteflies, and insecticidal soap for soft-bodied insects. Spray at dusk to protect pollinators, and reapply weekly while populations are active.
Can I grow organic vegetables in containers?
Yes. Cherry tomatoes, mini cucumbers, sugar snap peas, leaf lettuce, herbs, and strawberries thrive in 5–15 gallon containers. Use a peat-free or coir-based organic potting mix, water more frequently than in-ground beds (containers dry out faster), and feed every two to three weeks with a diluted fish or kelp emulsion.
How much garden space do I need per person?
Fifty to a hundred square feet per household member is a sensible starter footprint. Larger plots produce more food but also more labour, and most beginner gardens fail because they were sized for an ambition the gardener did not yet have the hours for.
How long does it take to convert soil to organic?
Stop using synthetic fertilisers and pesticides on the day you decide. The soil biology will rebuild as you mulch with compost and let the fungal hyphae re-establish. Most home gardens recover usable structure within a single growing season; certified organic conversion for commercial use is a three-year process under most national schemes, but home gardeners are bound only by their own standard.
Sustainable Gardening: Practices and Techniques for Eco-Friendly Gardens
Join
Loading...
Our Green Community!
Loading...
VerdeNook is more than just a source of gardening wisdom; it’s a platform for sharing, learning, and growing together. We invite you to join our community, share your stories, and spread the joy of gardening. Let’s sow the seeds for a greener, healthier, and more sustainable future, one garden at a time.